Setting Up Your Machine
Before we begin to go through the course material, we need to install and configure all the tools necessary for this course. Data Engineering requires working with a lot of tools, so buckle down and make sure you follow this section completely.
1. Setting Up Bash Environment
Data Engineers mainly work with Linux environments, and Bash is the default terminal of Linux based systems. We will be using the Ubuntu Bash terminal in this course. Windows users can install Windows Subsystem for Linux (WSL) which enables Windows users to run a native Ubuntu bash terminal. Mac OS has bash already installed, but we must configure it to be the default terminal.
Setup instructions:
test
Window Users Only
Windows Subsystem for Linux (WSL) Setup
Windows Subsystem for Linux or "WSL" allows Windows users to run Ubuntu Linux natively. This course extensively uses a Unix bash terminal. This allows Windows users to follow along and run bash commands natively. This is important since Data Engineers mainly work with Linux environments.
Install WSL 2
Follow Microsoft official documentation to install WSL 2.
NOTE:
UPGRADE WINDOWS FIRST
Most issues regarding WSL installation arise from older versions of Windows. If you are running a Windows Build lower than 19041, before enabling WSL 2 you must upgrade Windows using Windows Update Assistant. To find your Windows Build info, hit the Windows key and type "System Information". (At the time of this writing, the latest build is 10.0.19041)
Window 11
Some users are reporting issues with WSL when upgrading to Windows 11, with no clear fix yet. The links below might help you troubleshoot the problem. If you experience this, please let the instructor know, and we can take a look at your specific installation:
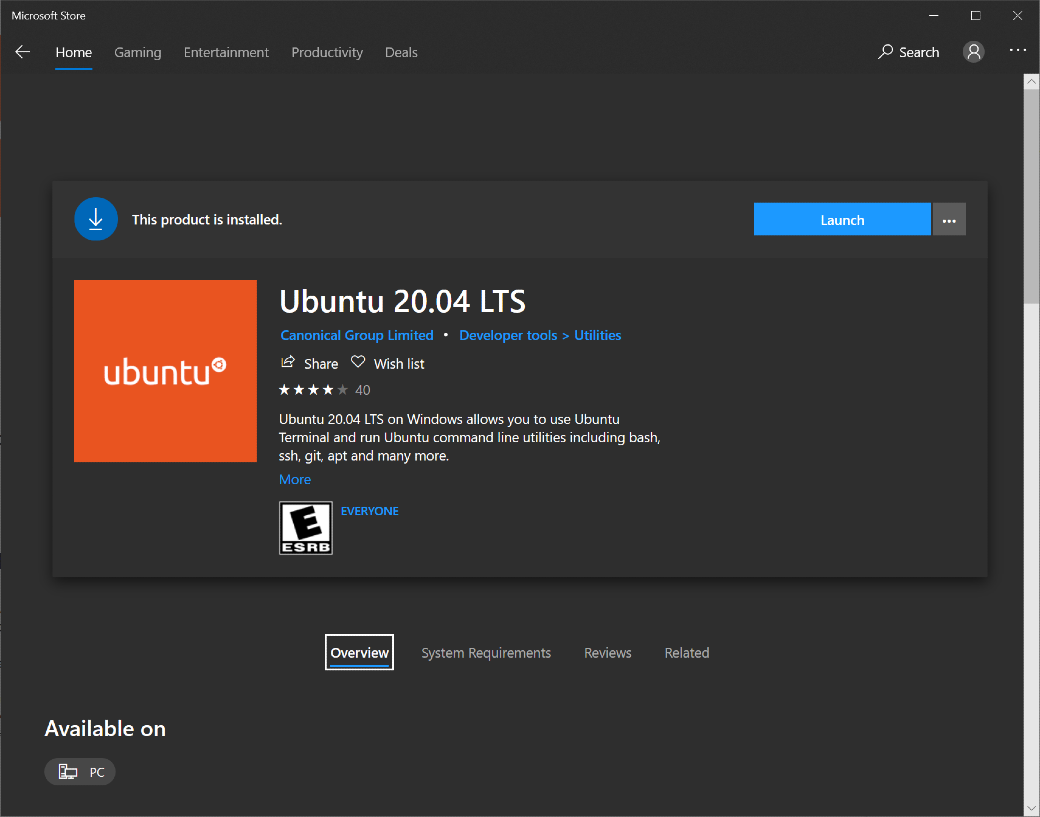
Install Ubuntu 20.04
Once you have WSL installed, you can install Ubuntu 20.04, which is our recommended Linux distribution.
Open the Microsoft Store App: Install Ubuntu from the Microsoft store
Once you have Ubuntu installed on your WSL, you should update your Ubuntu install:
Start an Ubuntu terminal from the Start Menu
You will be prompted to choose a root password. Make sure to remember this. You do not have a chance to reset this if you forger.
Run the following:
sudo apt update
sudo apt -y upgrade
NOTE: You MUST first update/upgrade Ubuntu before you can properly install and run Python.
Accessing Files
Because Ubuntu uses a file structure, it's hard to find where your WSL Ubuntu files live under your actual Windows machine. To open the content of any Ubuntu folder, you can simply run the following command:
explorer.exe .
This will open a Windows Explorer windows that points to your current Ubuntu directory.
In reverse, your Windows files can be accessed from Ubuntu under:
cd /mnt/c
ls -l
This will list the content of your C Drive.
NOTE: As Windows users, you will install Python on your Ubuntu WSL machine; and NOT your native Windows machine. You're welcome to install these on Windows as well (especially Python); but they must run on WSL.
Mac Users Only
To change your default command terminal to Bash, run:
Linux/Ubuntu users can skip this step
2. Visual Studio Code (VS Code)
Installing VS Code
Visual Studio Code or normally called VS Code is our favorite IDE (Integrated Development Environment) and is what we will be using for this course.
Click here to Download and install VS Code
NOTE: During the last step of the installation, make sure to check all the boxes to add VS Code to your PATH and Explorer context menu.
Ubuntu users (only): You can optionally install VS Code via snap. This option is preferred since it will provide automatic updates:
sudo snap install code --classic
VS Code Extensions
VS Code is very powerful since it provides a vast number of extensions to work with various development tools and libraries. These extensions make development a whole lot easier.
Now, let's add the top data engineering extensions:
- Open the Extension Tab from the left panel or hit (
CTRL+SHIFT+X)
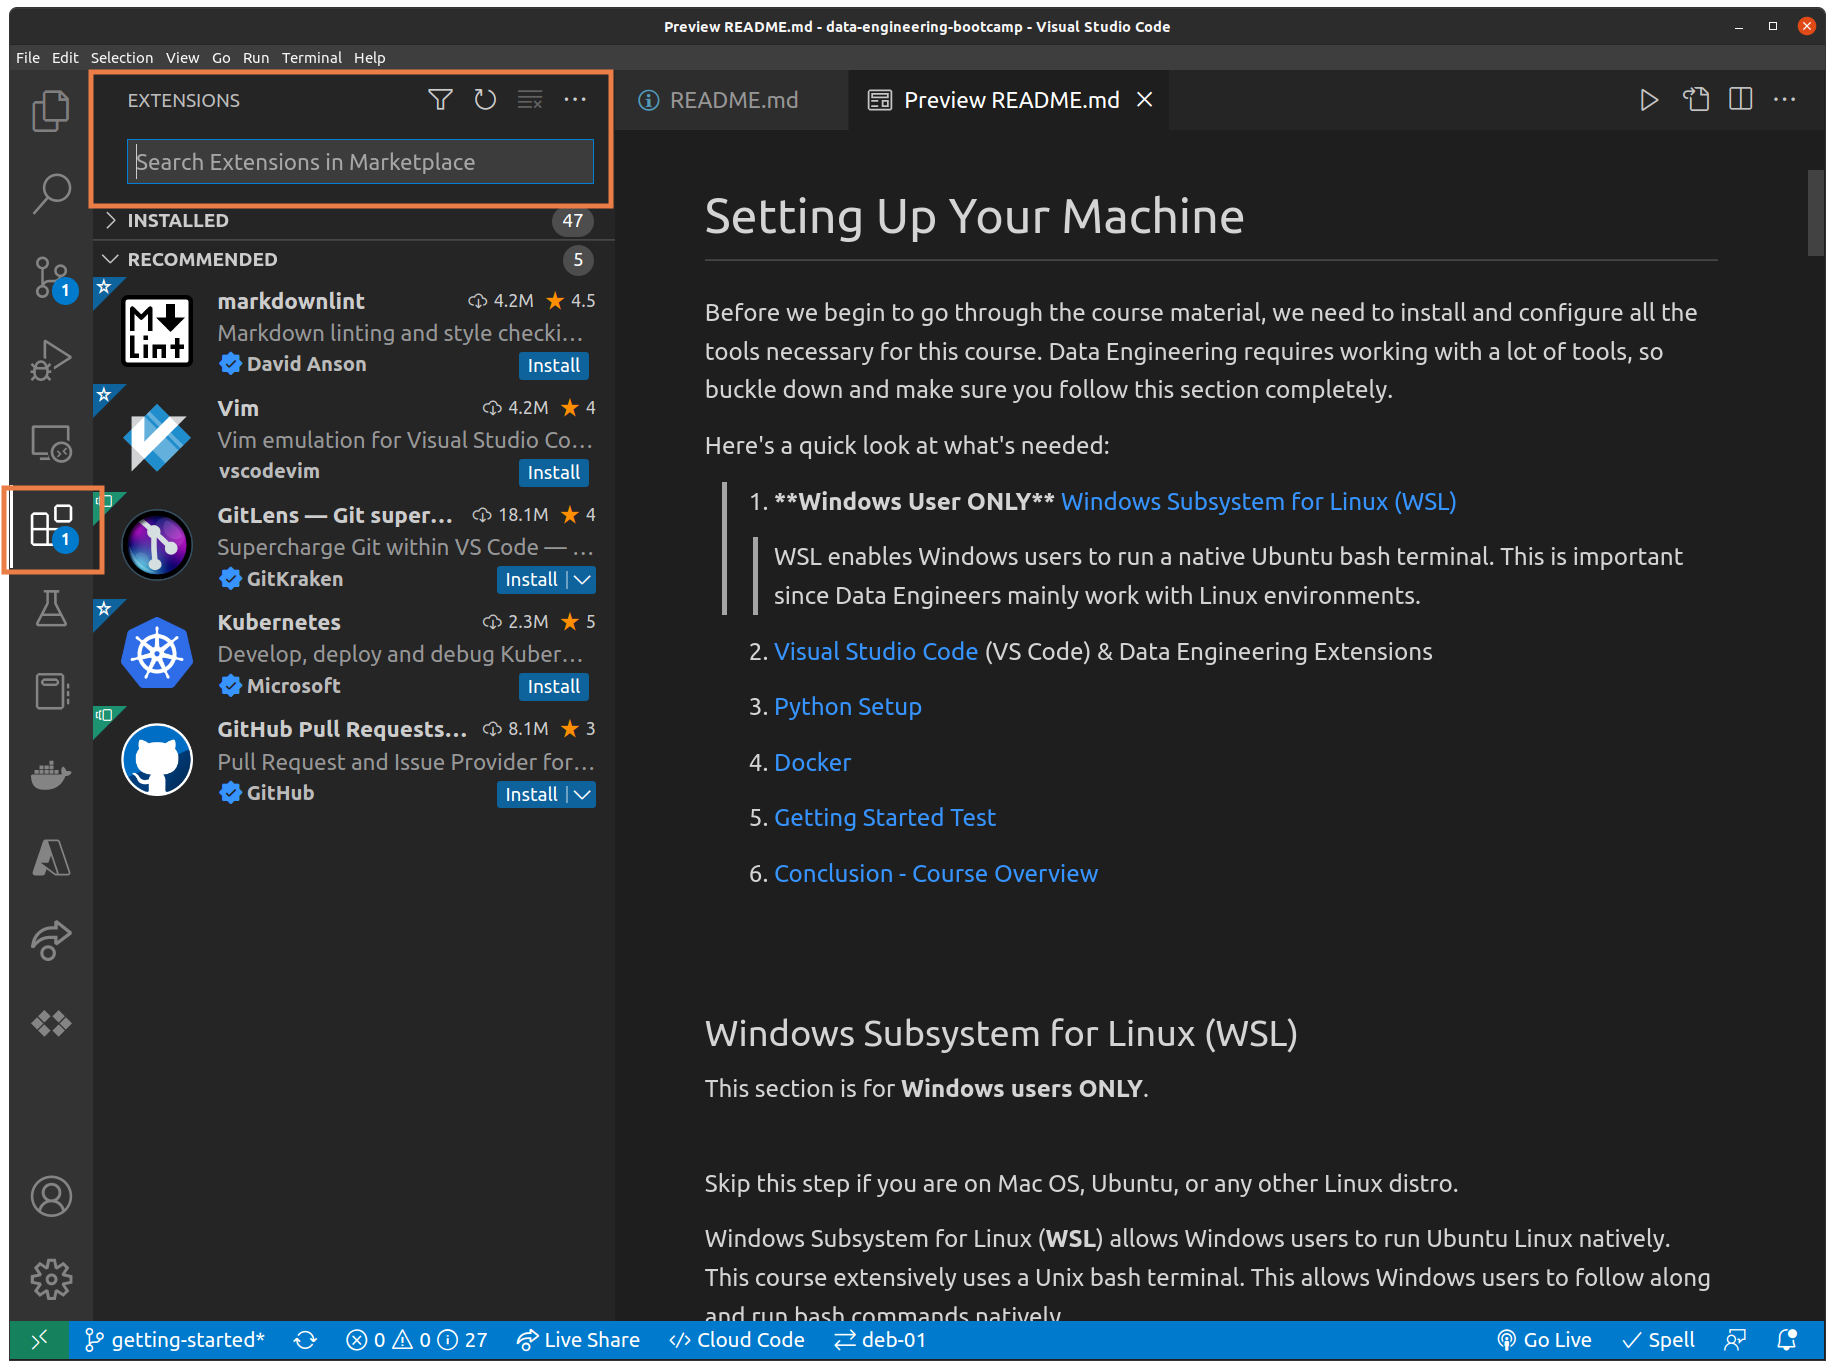
Search and install the following extensions:
MUST HAVE
Python (by Microsoft)
Pylance (by Microsoft)
Jupyter (by Microsoft)
Markdown All in One (by Yu Zhang)
Docker (by Microsoft)
Live Share (by Ritwick Dey)
Remote Development (by Microsoft)
MySQL (by Jun Han)
Cloud Code (by Google Cloud)
NICE TO HAVE
- Code Runner (by Jun Han)
- CSV Rainbow (by mechatroner)
- SQLite (by alexcvzz)
- Code Spell Checker (by Street Side Software)
VS Code Shortcuts
There are a few important keyboard shortcuts in VS Code that you must memorize:
| Shortcut | Description |
| ---------------------- | ------------------------------------ |
| CTRL + SHIFT + V | Opens a markdown file in preview mode (html formatted)|
| CTRL + SHIFT + P | Opens the VS Code command prompt |
| CTRL + SHIFT + F | Searches the entire project |
| CTRL + | Toggles the terminal | |CTRL+P | Opens files from command prompt | |F5` | Starts debugging |
Opening Projects in VS Code
You can use the File menu or terminal to open new or existing VSCode projects.
The terminal method can sometimes be useful when you are navigating between project folders and need to quickly view the code in your working directory in VSCode.
This works out of the box on Linux and Windows; Mac users follow this additional step.
Then, you can run the following in the terminal while in the directory of the project:
code .
This will open a window with the contents of the current directory in VS Code.
Viewing Markdown Files
To read the Markdown instructions files:
- Open the markdown
.mdfile - Press (
CTRL+SHIFT+V)
This renders the markdown file as HTML which is a lot easier to read and follow.
3. Python
This course is developed for Python version 3.7.
Even though Python 3.9 and 3.10 are currently available, a lot of the dependency packages in this course don't support them. You are free to install other versions (ie: 3.9 or 3.10) but you must have a working version of python 3.7. In fact, it's very common to have multiple versions of Python installed.
Set Up Instructions:
Check to see if you already have Python installed by typing the following in the terminal
python3 -VYou can skip this section if you see any version that starts with
3.7.*(here we have 3.7.13).Don't worry if you see another version or nothing at all. That just means we need to install it.
If you do NOT have a version of Python 3.7 installed, then follow one of the following guides to get it set up on your machine.
Ubuntu and Windows WSL Users
**NOTE:** Windows users should run the python installation steps below from their WSL Ubuntu machine.

1.  First add the _deadsnake_ ppa repos which contain Python3.7 binaries:

    ```bash
    sudo apt-get update
    sudo apt-get install software-properties-common
    sudo add-apt-repository ppa:deadsnakes/ppa
    sudo apt-get update
    ```

2.  Now, install Python 3.7 along with pip and virtualenv:

    ```bash
    # install python3.7, pip, and python virtualenv
    sudo apt-get install python3.7 python3-pip python3-venv

    # upgrade pip and other essential python packages
    python3.7 -m pip install --upgrade setuptools pip virtualenv
    ```

3.  Some users will need to add `pip` to their $PATH.

        **Skip** this step if you can successfully run this command in a terminal:  `pip3 --version`

        ```bash
        printf "\n\n# adding pip to \$PATH\nexport PATH=\$PATH:/home/${USER}/.local/bin" >> ~/.bashrc
        source ~/.bashrc
        ```
**NOTE**: Windows users **must install python under their WSL Ubuntu terminal**. You can additionally install it on Windows itself if you prefer to have both.

<br />
Mac OS Users
<br />

- Use brew to install python 3.7, pip, and virtualenv:

      ```bash
      brew install python3.7

      # install pip (python package manager)
      curl https://bootstrap.pypa.io/get-pip.py -o get-pip.py
      python3.7 get-pip.py

      # upgrade pip and other essential python packages
      python3.7 -m pip install --upgrade setuptools pip virtualenv
      ```
**Run into issues?** There are alternative ways:

- The easiest way is to Google "install python3.7 <your operating system>" for example _"install python3.7 ubuntu 20.04"_ or _"install python3.7 Mac OS X"_. Follow the instructions that you find for your operating system.

- You can download python3.7 installers from [python.org](python.org). If you decide to go this way, download and install the highest 3.7 version from python.org.
4. Jupyter Notebook
Many of the code examples for this course are in Jupyter notebook. Jupyter notebooks have become the standard for interactive, collaborative programming and reproducible research. Nearly all data analysts, scientists, and engineers use these notebooks regularly as part of their work.
Jupyter Notebook uses the file extension of
.ipynb. We call these files notebooks.To install Jupyter simply run:
pip install jupyterlabin the terminal.- You can work with notebooks with either option below:
Working with VS Code (Easier option)
{" "}
<br />
Working with Jupyter-lab (Optional)


5. Docker
Docker is a containerization tool. It enables various software such as Databases and Big Data applications to run on your machine (as containers) without going through complex installation processes. Docker is also one of the main technologies used behind the scenes to build Cloud services. We will extensively cover this technology in Chapter 5.
To install Docker follow the Docker Installation guide on their site.
- NOTE: WSL users should follow the Docker installation for Windows using "WSL 2 backend".
- In order to test your docker install, open a terminal and run:
docker run hello-world- This command should execute without any issues.
6. Git CLI
Let's make sure we have git cli installed and properly working.
Please follow the instructions below for your OS: